Remoto Playback is a remote real-time review and approve software tool. Built from scratch with an audio-forward approach, Remoto Playback creates a studio-quality experience no matter where you are.
You’ve purchased a one time session, signed up for a free Test Drive, or you’ve purchased a subscription, now what?
This quickstart guide walks you through the following:
- Software installation
- A basic overview of Remoto Playback Desktop
- How to schedule a session, invite Guests, start and end a session
- How to collaborate with participants
This is a high level, quickstart guide only. For more information about anything mentioned here, please check out our comprehensive user guide.
¶ Software Installation
When you purchased Remoto Playback, or signed up for a free Test Drive, you will have been directed to download the software. The latest version can always be found here: https://remotopro.io/download
Once downloaded installation is easy:
- Navigate to the installer in your “Downloads” Folder
- Click to open the installer:
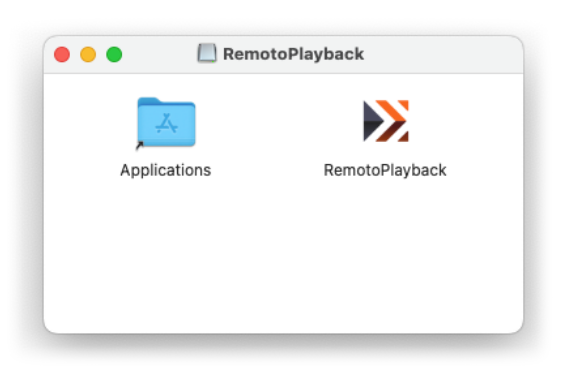
3. Click and Drag "RemotoPlayback" to your “Applications” folder.
You can now open Remoto Playback from your “Applications” folder.
NOTE: macOS “Privacy & Security” - Remoto doesn’t have control over when you will be prompted to set these for Remoto Playback. To avoid needing to restart Remoto Playback at an inopportune time, it’s a good idea to set these before you open the application for the first time. In macOS “Privacy & Security” Settings (Apple Menu > System Settings > Privacy & Security) make sure Remoto Playback is enabled for Microphone, Camera and Screen Recording.
¶ Remoto Playback Desktop Basic Overview
When you open Remoto Playback, you will be prompted to log in first. After you’ve logged in, you’ll be looking at Dashboard view, where you can:
- View a list of scheduled sessions, including sessions you’ve scheduled, have been invited to, and/or purchased one-time sessions that are available for scheduling or configuration - If this is your first time opening the app, unless you purchased a one-time session, there likely will not be anything here.
- Schedule a new streaming session against a subscription plan by clicking the “+ New Session” button.

- Schedule a one-time session by clicking on the session name
- Once you’ve scheduled a session, or been invited to one, or have purchased a one-time session, you can access Session Details by clicking on the Session Name
- Accessing Session Settings by clicking “Configure” or “Details” under the Session Settings Column
¶ Top Right Navigation Buttons

- Profile
The “Profile” button accesses your Remoto user profile, where the email associated with your account is displayed.
Password reset can be accessed via the “Password” tab, prompting authentication with the current password before entering and confirming a new password.
Products tab displays what Remoto Playback Subscription plan, or one-time sessions are tied to the account, as well as their status.
- Go to Store
Clicking on this button will take you to the Remoto Online Store, where you can upgrade or downgrade your existing plan, or make a new purchase.

- Sign Out
Clicking on the sign out button will log you out of Remoto Playback Desktop.

¶ Left Side Navigation Buttons
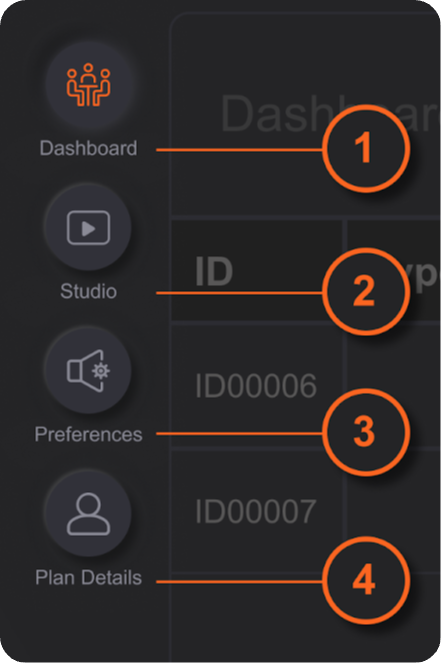
- Dashboard: The “Dashboard” button toggles to Dashboard view, which is the default view of Remoto Playback. This is where you can schedule, start and end sessions, and access session details and session configuration settings.
- Studio: The “Studio” Button toggles you to the live session view and is active only if you are in a live session while hosting a live session (or have joined one as a Guest).
- Preferences: The “Preferences” button toggles access to local settings for video conferencing, call audio and stream audio.
- Plan Details: The “Plan Details” button toggles access to the “Products” tab in the Profile Window.
¶ How to Schedule a Session, Invite Guests, Start and End a Session
¶ Schedule a Session
A session can be scheduled through the New Session/Session Details* window in 1 of 2 ways, depending on the product purchased:
- One-time sessions (including free Test Drive sessions)
If you’ve purchased a free Test Drive, or one-time session, they will auto populate in your Dashboard waiting to be scheduled. Click on the “[Session Name]” to bring up the New Session window to schedule this session.
2. Sessions created against a subscription plan
These are scheduled by clicking the “+ New Session” button in the Dashboard. This will bring up the New Session window to schedule the session.
*The New Session window, once saved, becomes the Session Details window.
New Session Window:
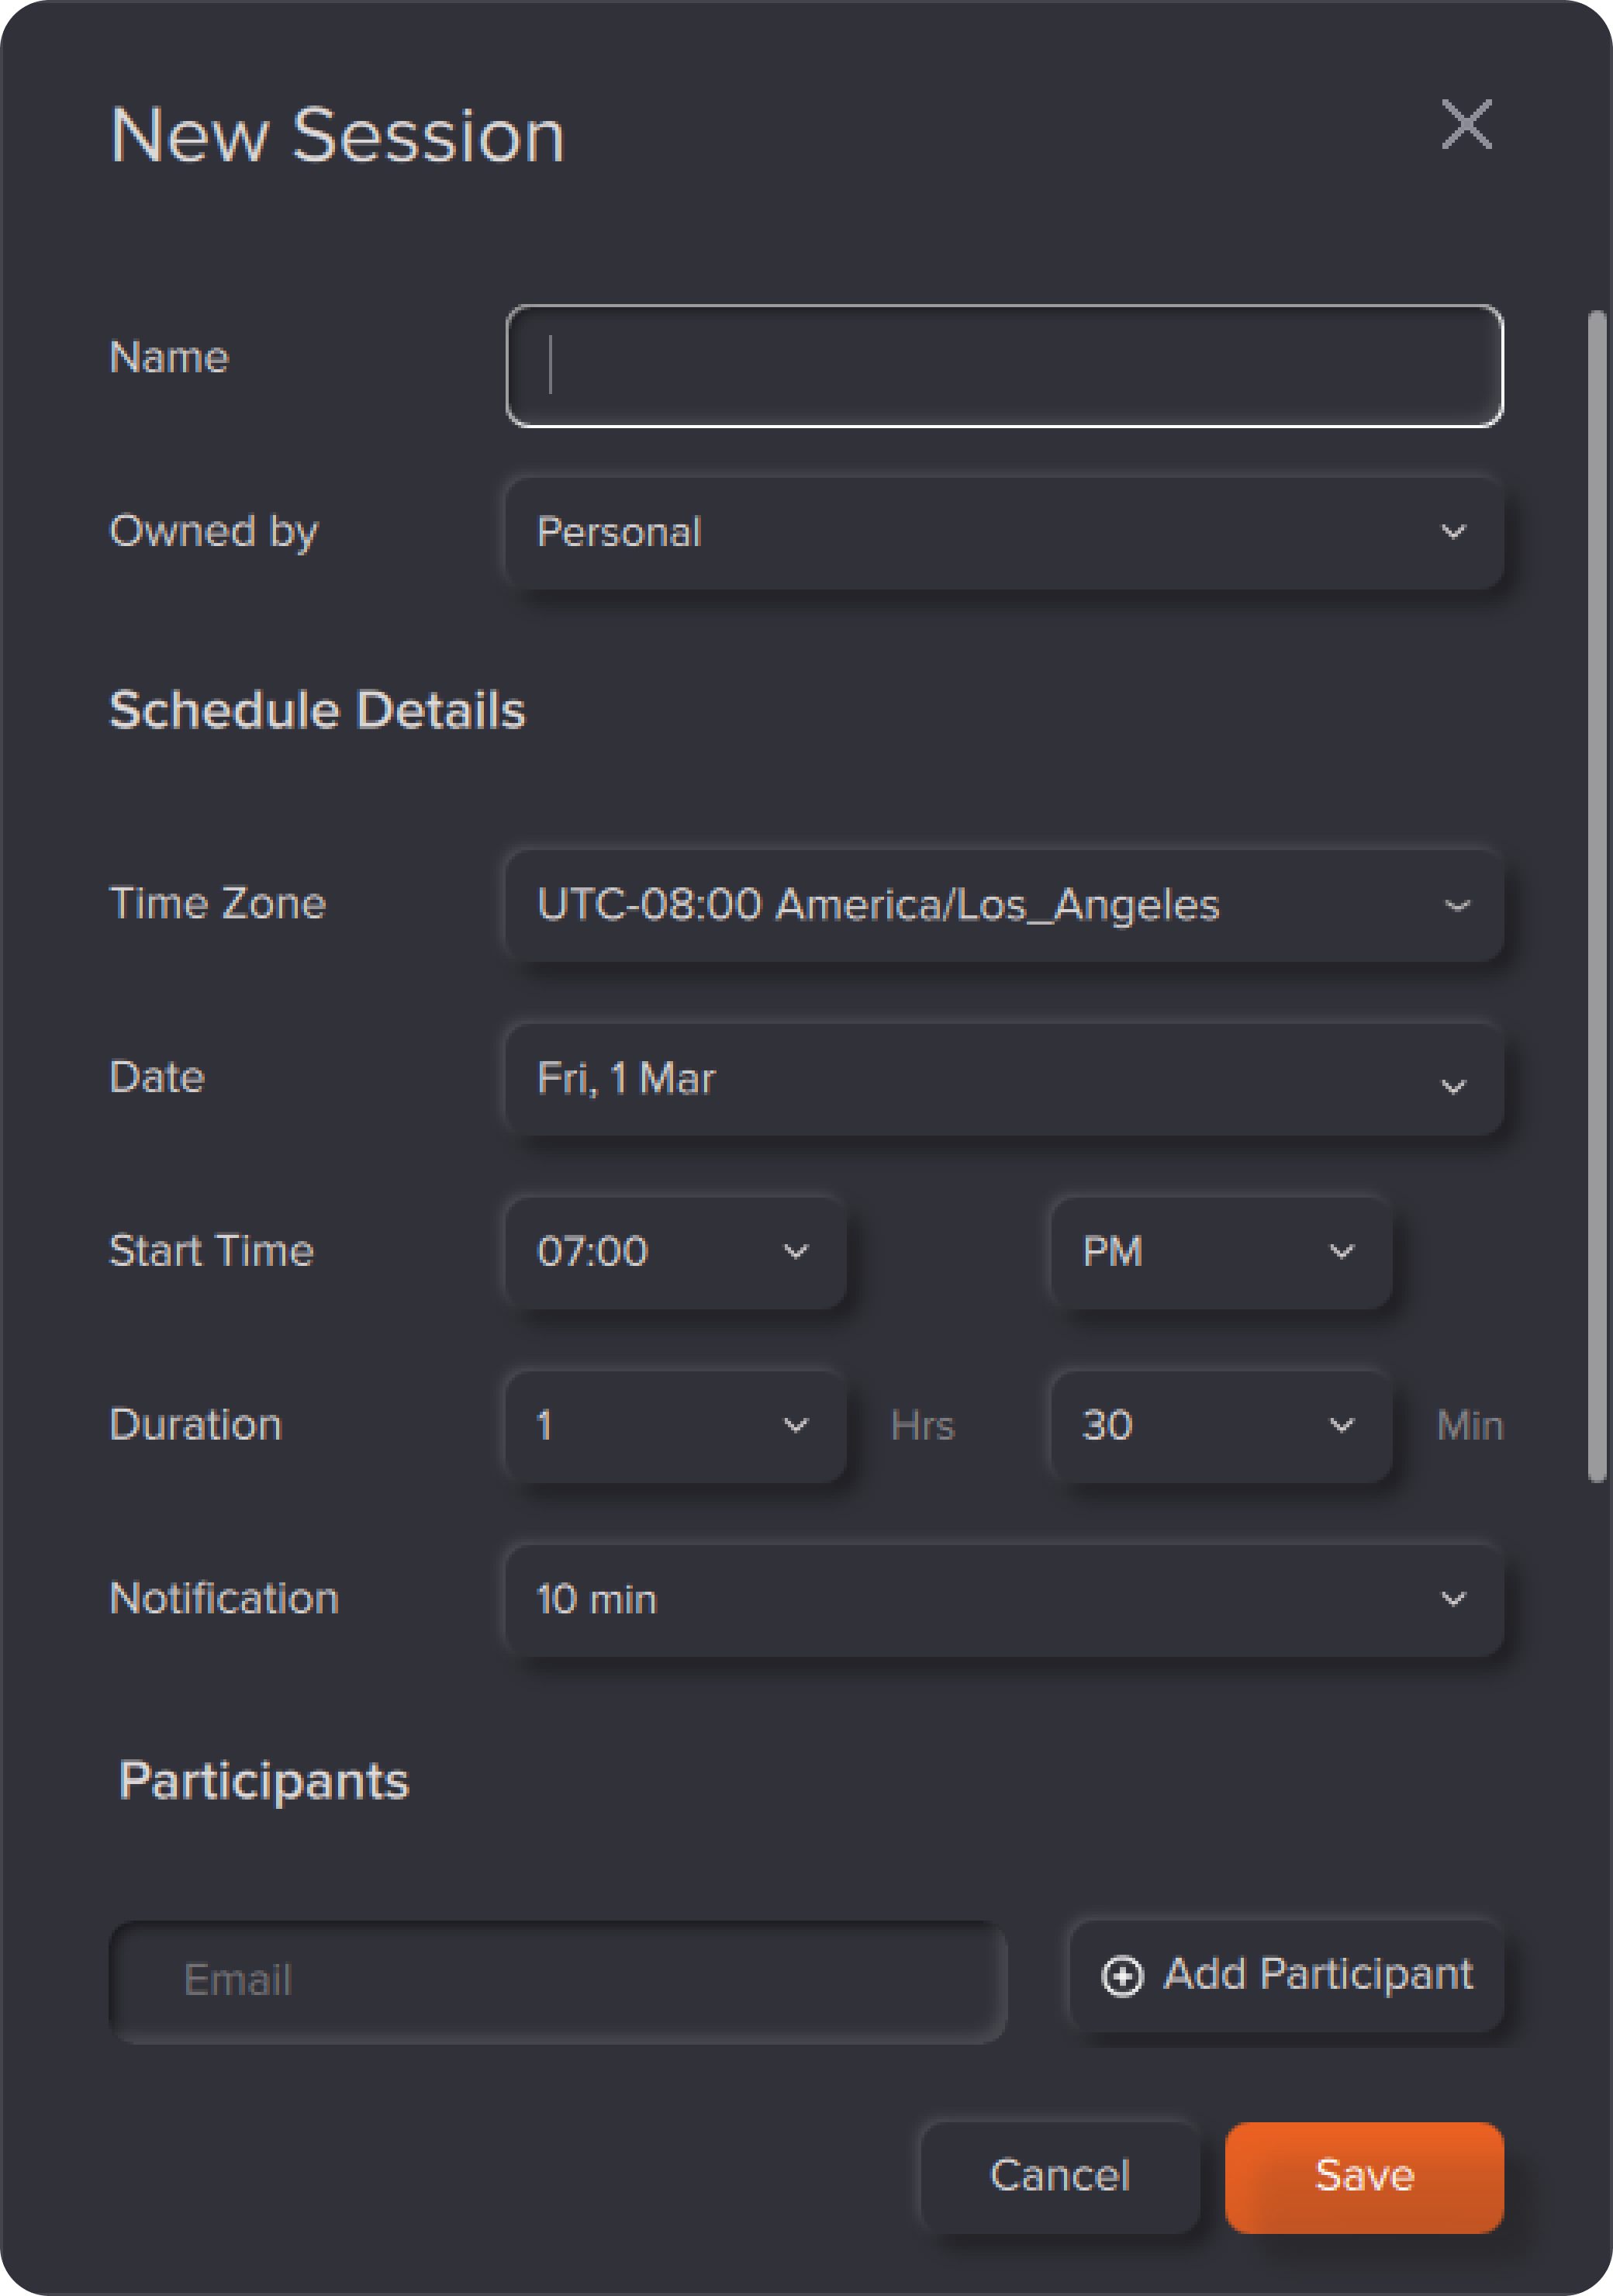
Fill out all the details to schedule your session. The “Participants” field is where you can invite a Guest (make sure to click on “add” after entering an email) but this can be done later as well.
After you click “Save”, your session is scheduled!
¶ Invite Guests
From the Session Details window: click on the Name of the session, then the pencil button to be able to edit, and add the Participants’ email that you would like to invite, and click “add” after each one. Click “Save” when you are done.
Once you’ve invited a guest, they will receive an email with scheduling details and join links.
¶ Start Session
Starting a streaming session has a few steps involved:
- Session Settings must be set up
- Source media must be active and ready to go
- Click Start Session
- Configure your local call and stream preferences
- Click Start Stream
¶ Session Settings
Before you start a session, you need to configure Session Settings to be able to set up your stream first. Once you’ve scheduled a session, you’ll be redirected to this window, but it can be filled out at any time before you start your session.
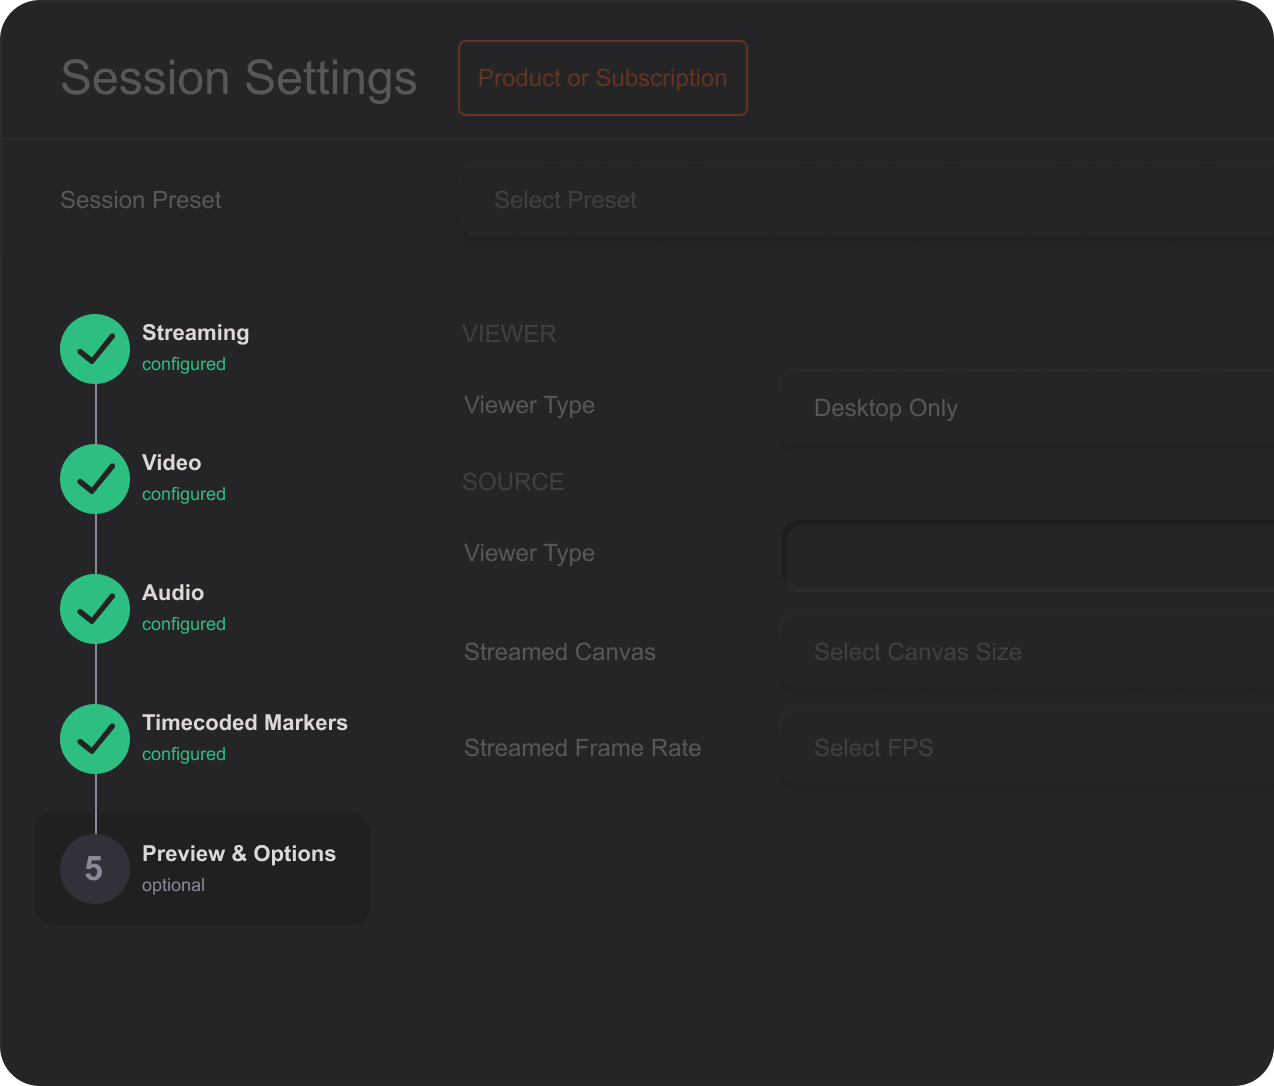
Streaming, Video, Audio and Timecoded Markers settings all need to be configured before you can start a stream.
- Streaming Settings: This determines how your stream will be viewed by your guests.
- Video: This is where you determine the video source for your stream.
- Audio: This is where you determine the audio source for your stream.
- Timecoded Markers: This is necessary to configure to be able to use the Timecoded Markers function of the application once you are in a live session
After you’ve configured your settings, you can start your session!
Make sure your source media is ready to go before you are ready to start.
¶ Start your session!
When you are ready to start your session, press "Start" all the way to the right of the session in Dashboard view.

¶ Configure and Check Your Local Audio Settings
Before you can start/enter your session, you will be asked to to configure your Call and Stream preferences. You can also check your camera feed, microphone, and speakers here before entering the stream.
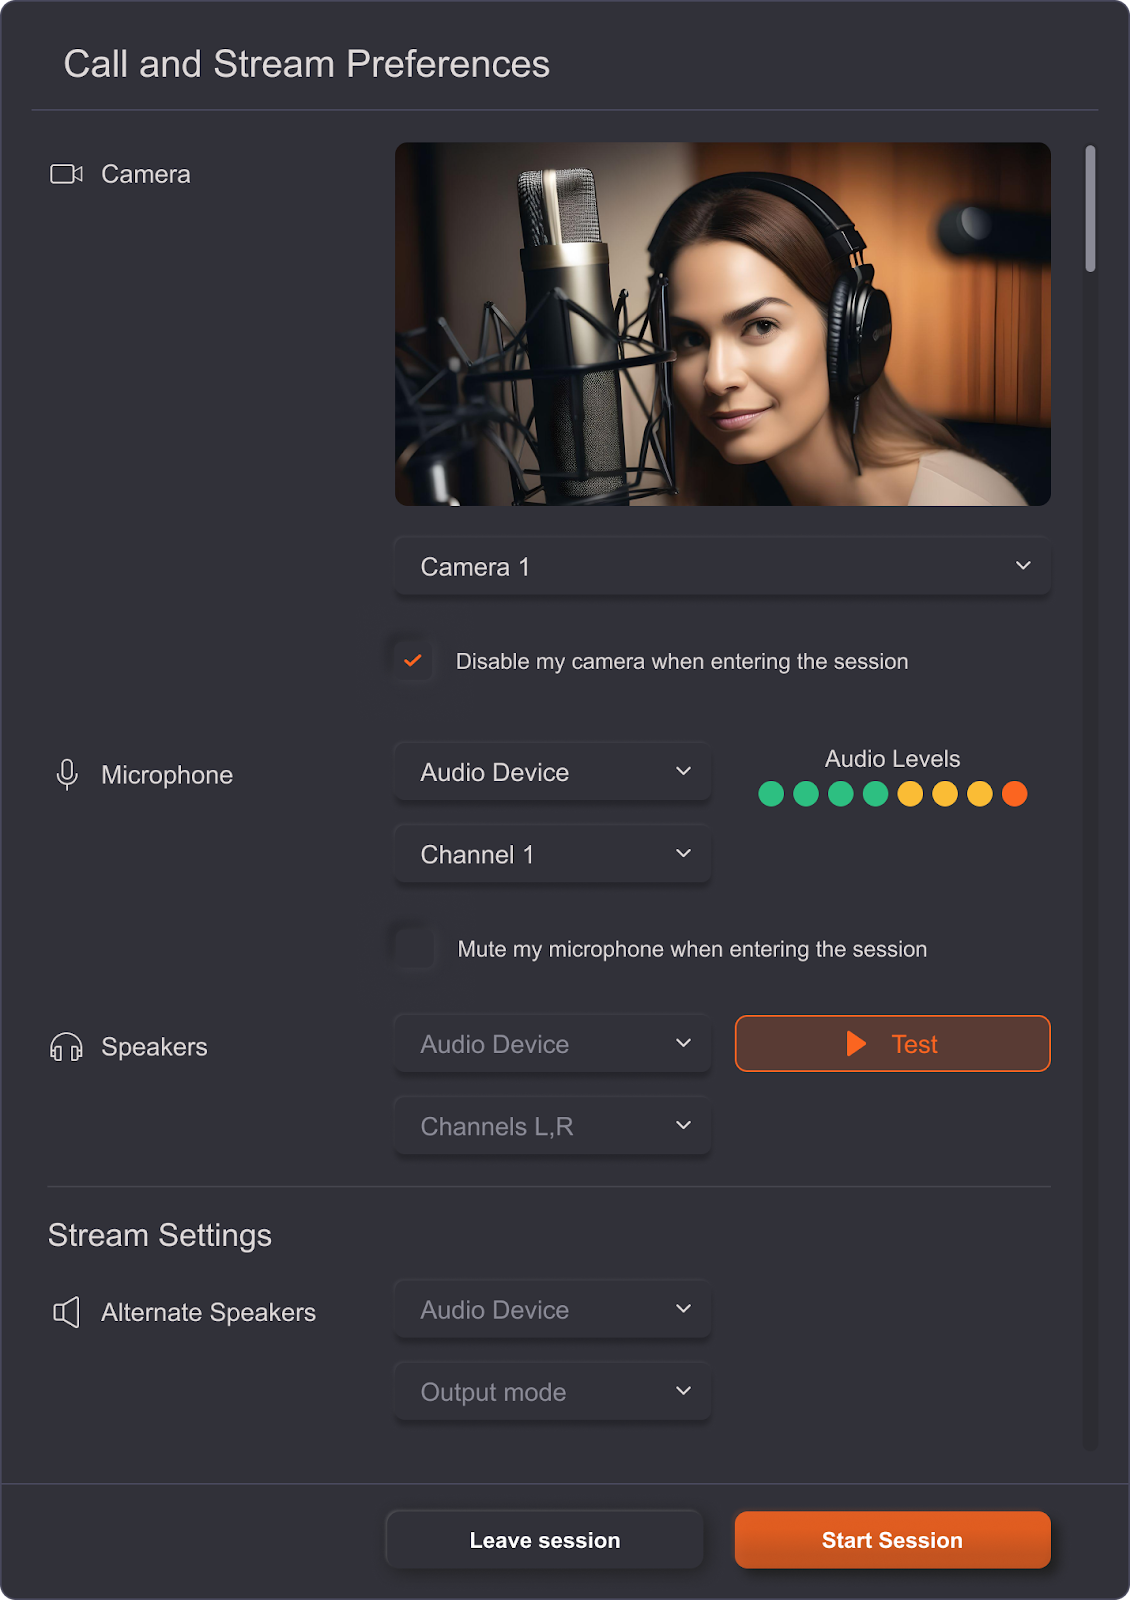
The conference call audio and the audio from your stream will output to the Speaker selection set, but if you would like to send your stream audio to an alternate set of speakers (or a multichannel set up) you can do so by utilizing “alternate speakers”.
Click “Start Session” when you are ready! Guests will be notified that the session has been started, and they’ll be able to request to join at this point. You will receive pop-ups to admit or decline them.
¶ Start Stream
Material will not be streaming until you press the "Start Stream" button in the top right of the Streaming window:

Your streaming session is now live!
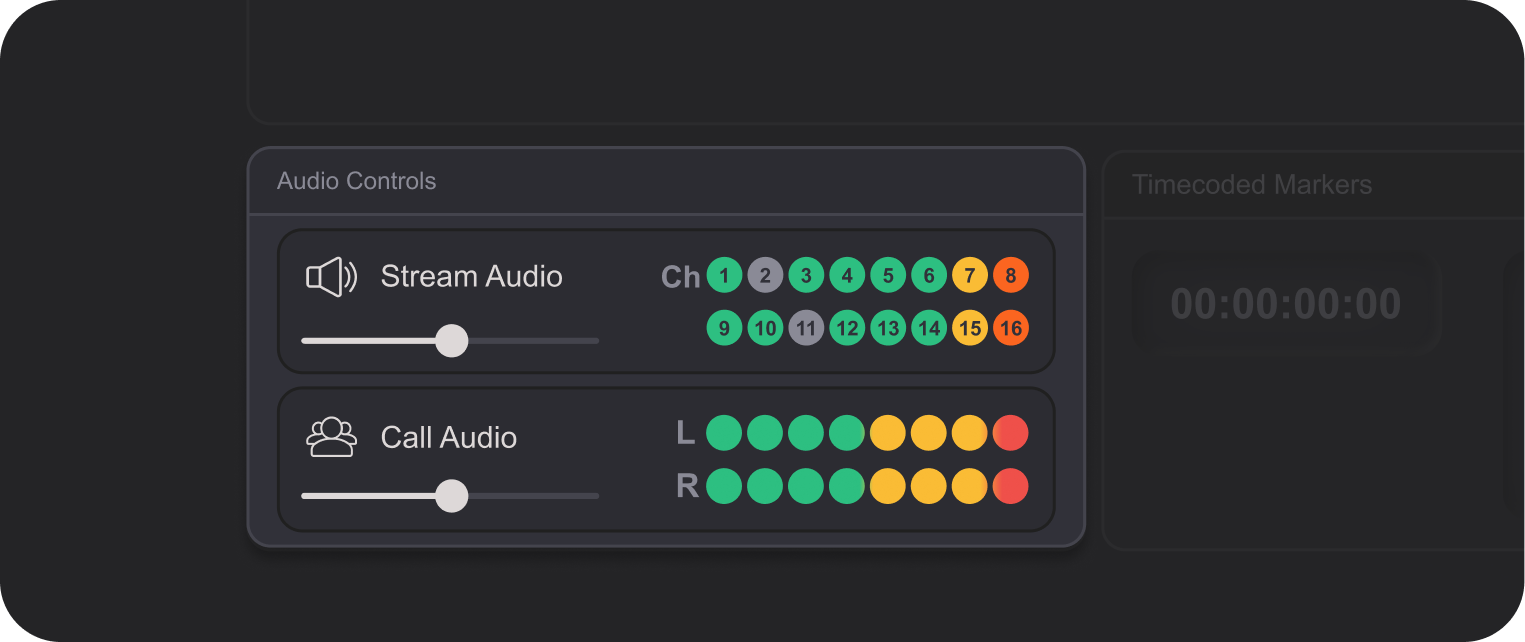
You can adjust the conference call audio and the stream audio separately with the local audio controls in the lower left hand corner.
¶ End Stream
To close a streaming session, and end the meeting for all Guests, click on “Stop Session” in the red banner next to the green “You are in an active session” banner at the top of the screen.

¶ Collaborating with Guests
When you are in a live session, you can communicate with participants through the audio chat, text chat and video chat! There is also the ability to insert Timecoded Markers that can be exported by any participant before the end of the Streaming Session.
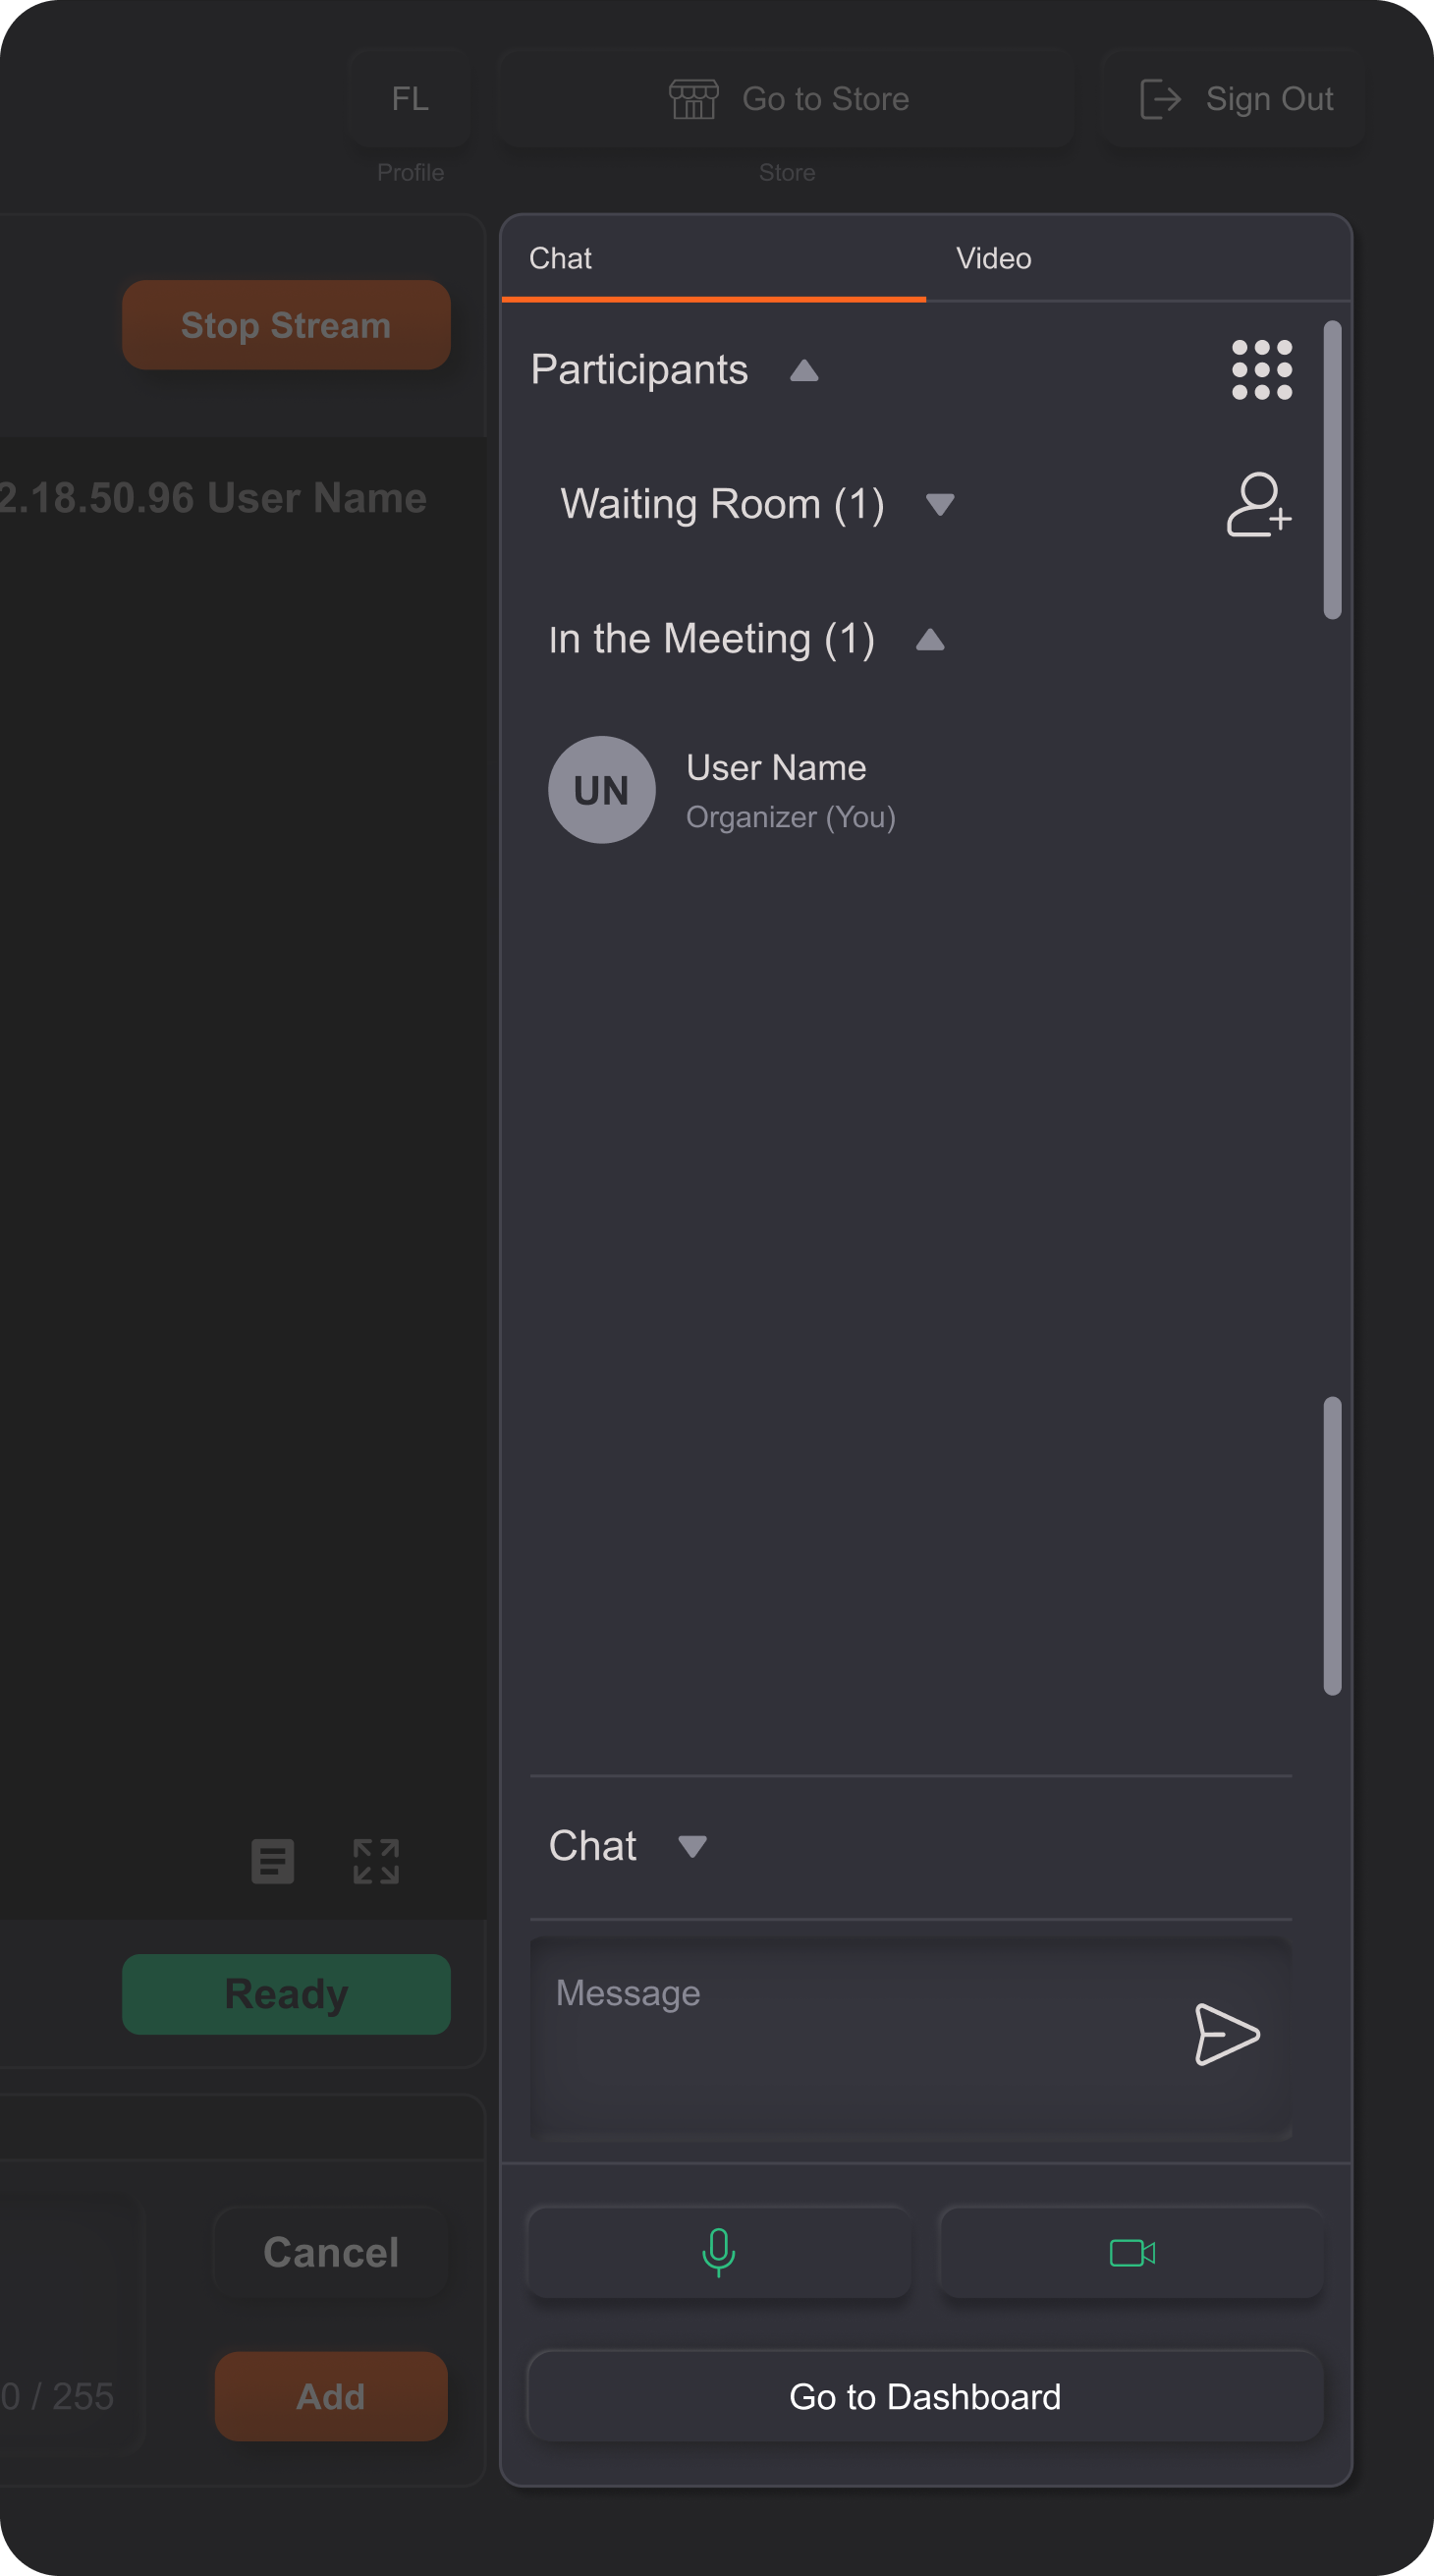
The toggle to switch between Chat and Video can be found at the top of this section. The Chat tab includes history of text chats for the session, as well as participant management; the Video tab displays video chat participants.
The chat text entry box, mute/unmute microphone controls, video feed on/off toggle are found at the bottom of this section.
Clicking on the grid icon next to participants toggles access to “Mute All”, “Disable (Deafen) audio for All”.
¶ Timecoded Markers
If your DAW has been set up to generate timecode, Remoto Playback will chase it.

Clicking into the Timecoded Markers field will immediately grab the timecode location in that moment. Enter text and click “Add” to submit a marker.
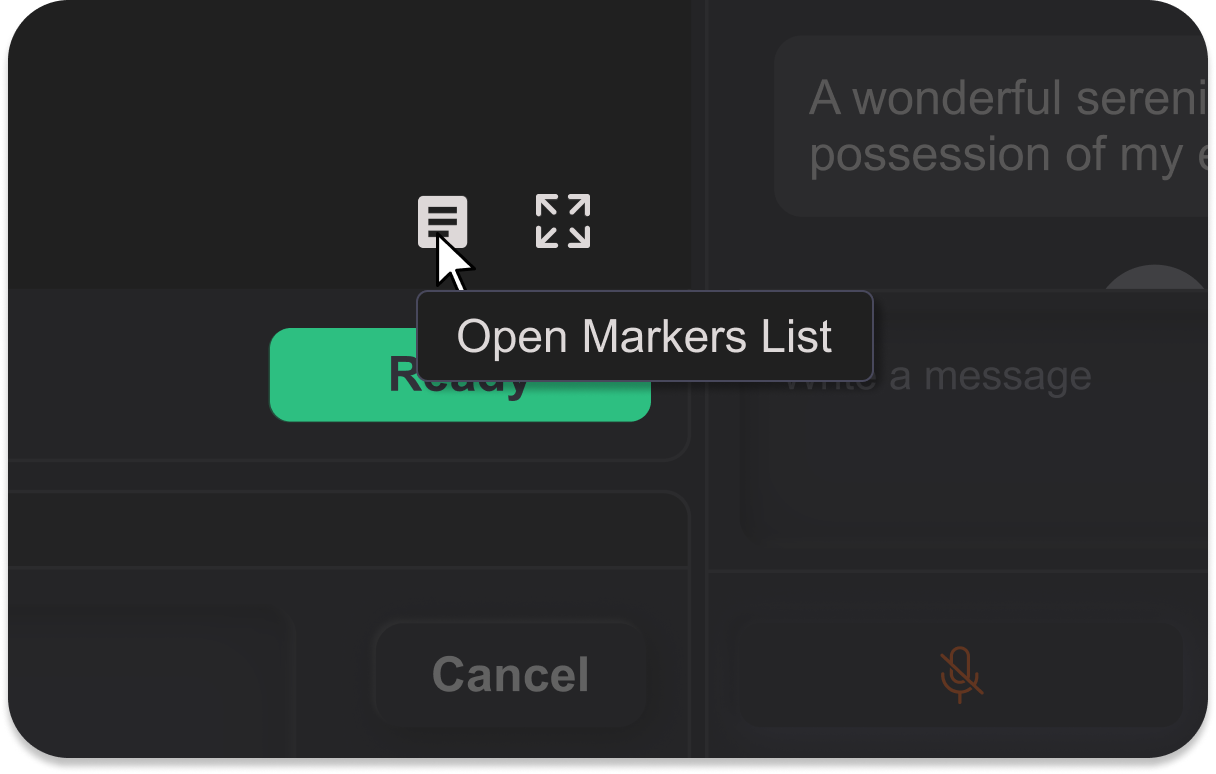
Click on the “Notebook” button next to the fullscreen button to access a list of markers and to be able to access export options.
